Wednesday, April 30, 2014

An Overpass

CN 2026 is passing under the new concrete overpass.


My layout is heavily inspired by the old grain elevator near Route Lagueux in St-Nicolas (east to Charny) on CN mainline on Quebec South Shore. At this very place is a typical exemple of a highway access road concrete overpass built in the early 60s when Quebec was developing its highway network.

Basic shapes glued together and test fitted.


I've always found it a nice locale when I was a kid and my father would drive us to a aunt living in the area. So I decided to make a replica of it to hide the staging area.


The prototype was measured with Google Earth help. Deck and piles are made out of 1/4" MDF. Lots of fun on the table saw! Well, in fact, it was more straight forward than I anticipated.


MDF parts were glued together with carpenter glue and illustration board was used to define the underside of transversal girders. They would be used as lost form when pouring plaster.

Plaster set in place to fill the gaps.

I finally used plaster of Paris to fill the gaps and get an even surface. The back of a saw was used to shape correctly the plaster. Some rough spots are there, but I'll keep them to represent crumbling concrete (eh! Quebec is famous for it's sh*tty concrete infrastructures and poorly built roads... looks like 400 years isn't enough to learn the lesson up there!!!). Joke aside, it will help to get a more realistic look. I often feel plastic kits and styrene lacks the texture to make believeable massive concrete structures.


Monday, April 28, 2014

On The Road Again

A CN bulkhead flatcar blocks the main road while trucks are patiently waiting.

I worked on the road tonight, using a mix of Mindheim and Gravett's technic to make the road. So far, results outdid my expectations. Still lot of weathering to do and also to glue in place the road.


The road itself is made with illustration board and painted with Krylon Camouflage beige and Krylon gray primer. Using an X-Acto blade, I scribbed cracks and also removed layers of cardboard to represent peeling asphalt and potholes.

Distressed the side of the road is a good way to enhance realism.

I distressed the road mainly where trucks will quit the main street to go to the feedmill or team track. I used real life pictures of grade crossing to figure out the typical  wear between a road and rails.

The road was particularly distressed were vehicles wheels hit the track.

I only had bits of cardboard, none big enough to cover the entire space in one piece. I didn't care and glued many pieces together with carpenter glue. When dry, I scribbed the joint to make it looks as if each piece was an asphalt patch.


After taking the pictures, I used gloss enamel topped with talc powder to better represent recent asphalt patch on the street. I think Gordon Gravett's technic is fine for some type of road, especially dirty one. But I understand why he said it was often better to only paint tarmac with flat paint. Next step is to paint road lines with my dreaded airbrush.

Sunday, April 27, 2014

Track work completed!


 Yesterday was a productive day. I installed and painted the backdrop and managed to paint the tracks and reassemble the module. So far, so good.


I also installed a wood crossing made of balsa. I distressed the wood to get a more realistic worn out look. India ink washes were used to stain the wood. I'll probably try to get an even more distressed look.


I also did a few operating session this afternoon. It takes about 30-45 minutes to switch the layout with an inbound train of 3 freight cars. These sessions helped me to find out what is good and was is wrong.

On the good side, the feedmill scene work just fine. It's fun to switch and looks pretty good.

However, I'm not that crazy about the runaround. Why? My office room isn't the best out there. It means my desk separate the two module. I have to go around the desk just to move one turnout, which can be frustrating as I have a wired NCE Powercab and the chord just get stuck over my desk. Also, the layout height is 39", which means I'm operating sitting on my chair. Nice to have a realistic view, but really bothersome when wanting to throw that far away switch.

Also, I only have about 24" long beyond the runaround, which makes sorting cars quite difficult when I have more than 3 cars to pull... A real bother...

Another issue is mainly visual. There's little space between the end of the runaround and the wall. It means a train leaving the layout after a session doesn't give the true feeling of definitily going somewhere beyond the layout.

I really want to adress these issues before moving on scenery. First of all, adding an overpass somewhere on the second module would be a good occassion to frame the scene and make the train disappear to some non-descript but scenicked staging area. The overpass would be located somewhere between the runaround turnout and the feedmill (the turnout would be on the staging area).

This solution isn't completely satisfying because the turnout is still far away. I could install a turnout control, but still, means I would have to walk around the desk to uncouple cars, which isn't the best option.

Another option is to remove the runaround an replace is by a stub siding running parallel to the mainline until it reach the right end of the layout. It would means I could not reverse trains anymore on the layout. Is it bad? Not that much. It could means the runaround does exist but somewhere beyond the staging area. I only hate the fact it would means more track density in front of the feedmill. I find this scene to be already crowded enough. Also, that would means track to relay and some rewiring... Well.

I could also see the layout as a throught mainline which is only switched by trains running right-to-left. That could be a very intesresting feature. If doing so, I would had a cassette on the right side, thought it could be quickly a gimmick.

So no, there's no easy way out. I think having a runaround is a double edge sword on a small switching layout. You really need enough place on one end to sort cars. I failed to see that. In fact, I had previously planned another shelf on the left side to have trains disappear to somewhere and have a switching lead. I scrapped the idea, but didn't think it would have an impact on operating pattern.

Anyway, before tearing down what I did, I will just continue to operate a little bit more to find more efficient patterns, just like a real railway would do.

Friday, April 25, 2014

Detailing Track

After two days of intense work, I finally completed installing more than 180 Detail West code 83 railbars at 39 scale feet intervals. Lots of work, but visually rewarding. Can't wait to paint and weather the track now.


I decided to go against common advice and install railbars inside the rails and not only outside. It is widely believe HO scale railbars may cause running issues when wheels bump on them. In fact, I tested a few bars with cars equiped with RP25 profile metal wheels and found not problems. I fact, they do clear the railbars. In some very rare cases, the railbars were a little bit thicker. Using a hobby knife, I scrapped about 0.01" of material on the top to make sure no issue will never happen.

So yes, you can install, just like the prototype, railbars inside the rails. But be careful enough to test the track and cut off except material if needed to make sure you won't have problem in the future.

Monday, April 21, 2014

Wiring and Downsizing

Yesterday Louis-Marie came to visit and give a helping hand to the project. He designed the wiring concept and made the bus wires and connectors. I only had to solder the feeders to the rails and connect them to the bus. A really straightforward job that worked just fine. I tested the track this morning and everything is running fine. Louis also taught me how to solder like a pro. Well, I knew most trick from my father, but seriously, you can't expect to do a nice job with an old pistolet-type soldering iron. With good tools, I was able to get consistent results. I think soldering is no more on my model railroading hate list anymore.

That said, while talking with Louis yesterday, it was apparent the need for a cassette was a nice addition, but lots of trouble to make working. The curve needed to connect the layout with the staging area shortened my already short passing track to 48" and it looked awful. Worst, some operation would have to be done on a 24"-30" radius curve, something I really hate. Seriously, the layout was starting to look like a toy trainset, which isn't my goal! For this reason, I said farewell to the cassette. While operating the mockup layout last week, I saw no need for it. Keep it simple! I'll stick with my gun and keep only the two modules I first designed. And I just got a few more hours to spend on the modules instead of wasting them on the module!

Next step is painting the track outside with a spray can. I hope I'll get my Detail West fish plates early this week. Once that done, I'll be able to permanently fix the layout in my room and start doing what I really want to do: scenery. I expect the concrete overpass to be the first big challenge. I'm seriously thinking about casting it in plaster to get the most realistic texture I can.

Saturday, April 19, 2014

Overpass: Be or Not To Be...

I'm seriously thinking about building an overpass between the cassette and the feed mill module. I thought it was artificial, but after a few short operating sessions, I firmly believe it help to break the scene into smething looking longer.

Lagueux Road overpass in Lévis (Bernières), Quebec (Google StreetView)


I've decided to reproduced a standard railway overpass along CN Drummondville Sub in Southern Quebec. This design date back to the mid-60s and is a favorite of mine.

Overpass seen from St. Pamphile Station (looking east)
Overpass seen from the feedmill (looking west)

I'll have to slightly move the glue about 1/2" inches to be able to install the overpass. I'm quite happy I only glued the track. Shouldn't be to hard to do.

That said, I'm seriously thinking about building right now the second module. Most operations take place there, also, I think the passing track could make a good team track. From there, I would had a staging track on the opposite wall of my room.

Here's a plan of my ideas. The left module will be called "Station Module", the right one will be "Feed Mill Module". Original!


Friday, April 18, 2014

A New Story...

In 1908, Quebec Parliament voted subsidies to build 25-miles of main line between Lac-Frontière and St. Pamphile with the ultimate goal to link Chaudière Subdivision with an interchange point with Temiscouata Railway at Cabano, QC. The line was never built because of WW1 but the project was revived during the early 30s to fail again in 1932. What would have happened if Quebec Central Railway did extend the Chaudière Sub up to St. Pamphile, QC, during WW1 as planned? We will try to answer that question while discovering a fascinating rural community bordering the State of Maine.at the time of Quebec Central Railway's slow demise during the late 80s.

*****


What should have been a dot on the line became an improvised terminal of an avorted main line whom last half-mile of track was converted into an industrial siding serving a sawmill; The 25-mile St. Pamphile Spur was born.

Rail facilities were spartan; a short passing track and the feed mill siding. No way to turn a steam locomotive up there; running reverse at slow speed down to Lac-Frontière was to be the rule until diesels roamed the place from the early 60s onward.


*****

In April 1986, nobody could tell if rail service was going to last until the end of the decade. The average Joe couldn't predict the 1987 recession would be the last nail in the coffin of the line.

*****
 
There was rumours of abandonment of line during the last few years. Last passenger train was in 1949 and the mixed train service ended back in 1967 for Canada's Centennial. Talk about an ironic coincidence for a country built by rails!

That said, most of the line trafic dried out when the forest resources depleted during the last two decades and the agricultural optimistic forecasts never quite materialized. One's would be a fool to expect Prairies-like outcomes from a rocky mountain plateau.

However, business is still strong in that small but industrious village. Sure the feed mill have been a loyal customer for more than 50 years now, but nobody could have expected the sawmill to grow that much when others were closing one after one. A big thanks to that big company that purchased it when it was on the verge of bankruptcy. Even the railway company had already pulled out the siding, sure this industry had dried out for good!

And finally, the unexpected provincial subsidies voted in 1985 to recommission the hydroelectric dam were like a God sent gift. For once, trucking can't beat the rail in such a remote place. Iit should last for two years, but who knows what will happen after that point? At least, the railway company will have hard time for while prooving Canadian Transportation Commission the line isn't profitable anymore and should be abandoned.


*****

November 1986, the last pulpwood shipment to Trois-Rivières paper mill convinced the company to abandon the line once for al.

March 1987, the railway company is trying to settle an agreement with the dam contractor to cease shipment of bulk material by rail. There will be penalties if they do so, but some people think it would be cheaper than running a bankrupt line until the end of the year.

December 1987, the die has been cast. The feed mill and the sawmill have switched to trucks over the last months when abandonment talks resumed. The rail line is now doomed by the recession and lack of clients. The railway company doesn't see any profit keeping the line open during the winter months.

April 1988, an important flood down severed the line down from the main network in the Chaudière valley near Beauceville. It's a matter a months before the official abandonment is effective. It's the end.

Layout fully operational!

Never underestimate a simple layout track plan. In about 3 days of little work on the layout, it is fully operational. I built the cassette and laid track in about 3 hours this morning. After lunch, I was able to test the track and operate a first diminutive freight train (I lack cars, most are on the club layout).


Laying track on the cassette.


Completed cassette with fully laid track.


To be realistic, the overpass should be at least one feet farther from the feed mill.
 

Yesterday, I built a mock up of the road overpass right to the feed mill. The idea was to have a scenic block... Good on drawing, but looked wrong in real. In fact, the overpass overhelm totally the scene and is unrealistically near the feed mill. Thus, I decided to get rid of it. Anyway, St. Pamphile is a remote community near Maine's border. There's no important road there that would justify building a large concrete overpass over a decaying railway line. So less scenery work for me! And seriously, that makes the scene looks larger and I'll probably build the second module one day. Also, having a turnout under an underpass is a real pain. Better have all of them in plain sight.


After operating the layout, I was convinced again the low track density was right. Including the cassette, that means about 160 inches of straight mainline, more than the club layout can ever hold. Better, switching this small shelf layout means your locomotive have to travel every inches of the layout. The only down side was the lack of sound on Jérôme's CP Rail RS10. It's time I bring back my RS3 at home, after all, I bought and weathered it for personal use on my home switching layout. I'll also get back my TLT Canadian Pacific and CP Rail wood cabooses. I'm seriously thinking about getting myself a Rapido Angus CP Rail caboose (and getting rid of the ludicrous interior lighting, what an unrealistic gimmick, it ruins the model).


By the way, I tried to use my TLT 8-hatch CN reefer... What a junker. Wheels don't roll freely in the trucks. This car will need a massive rebuilding program to run smoothly on the layout. Honestly, at the price these things are sold, you expect they can at least run. Last time I bought a unusable RTR car was circa 1990 when I bought a CP Rail 50ft boxcar manufactured by Model Power. Many comments over Internet indicate my sample is far to be an obscure case of bad quality check. TLT should be more serious, they got great cars, well-detailed and prototypical, but messing up the basic isn't gonna improved their faltering reputation. I hope the Pointe-Saint-Charles caboose won't end as badly as this reefer. That would be the icing on the cake.

Wednesday, April 16, 2014

Layout Track Plan

I didn't feel the need to make an elaborate track plan for this particular layout, but a sketch will help to get a general idea of the project.


The runaround is about 48 inches long and thus can hold about 6 cars, which is more than enough for this project. The feed mill siding got 3 car spots including the builder's supplies warehouse. The team track can hold 2 or 3 cars, depending their lenght. I would like to have some log loading equipment there to put to good use my Walthers pulpwood cars. A very nice place to display nice trucks.

A small dirt road will run along the runaround. I'm still wondering if that road will continue under the overpass...

*****

I'm quite satisfied with this track arrangement because it is exactly what can be found in most rural communities I know. I definitely see no need for more trackage since switching what seems a simplistic layout can really become more complex when you try to run it like the real deal. Going overboard would be easy and balance between track density and scenery would be lost.

The removable cassette could be replaced, in the future, with another module representing the other half of the passing track with access roads and dilapidated railway sheds and equipment.

A second module depicting a lumber yard could also be added on the right. Since my teenagers years, I always wanted to model our local sawmill in my hometown and that would be a neat occasion to do so.

Tuesday, April 15, 2014

A fresh start...

As many of you know, working on the club layout may be frustrating at some point because it takes a long time to get to some satisfying point. Gaining impetus may be very hard because lots of preparation work is involved. Honestly, I'm really interested in doing scenery. It's been two decades I'm seriously involved in the hobby and never got to a point were I felt I really created some credible word.

For this reason, I started building a small switching layout. Last summer I built 3 modules on hollow core doors. Never laid track on them, but store them in the basement for future use, if the bug would bite me again... I really came handy this week end.

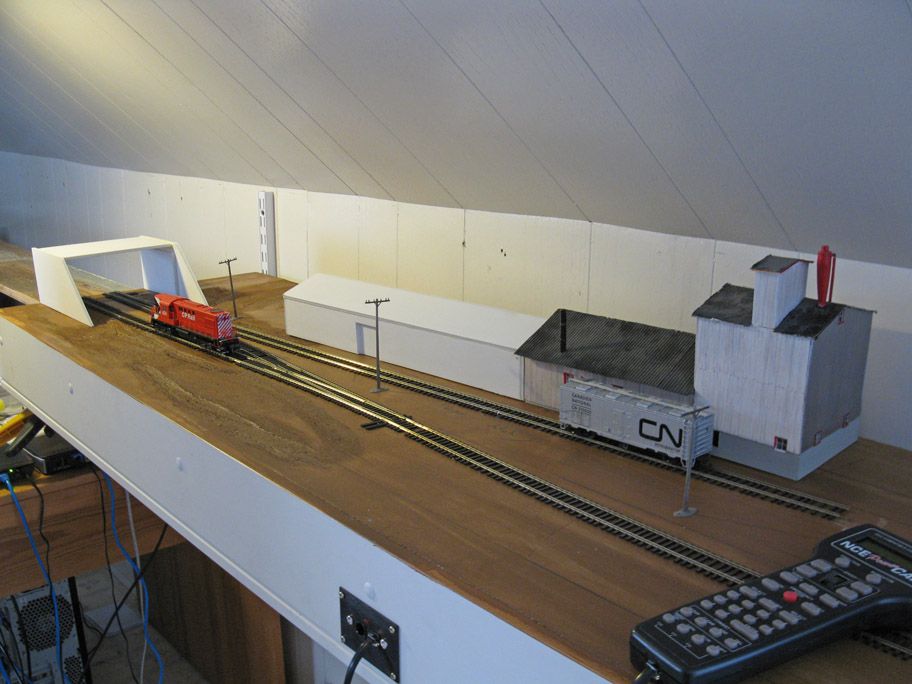
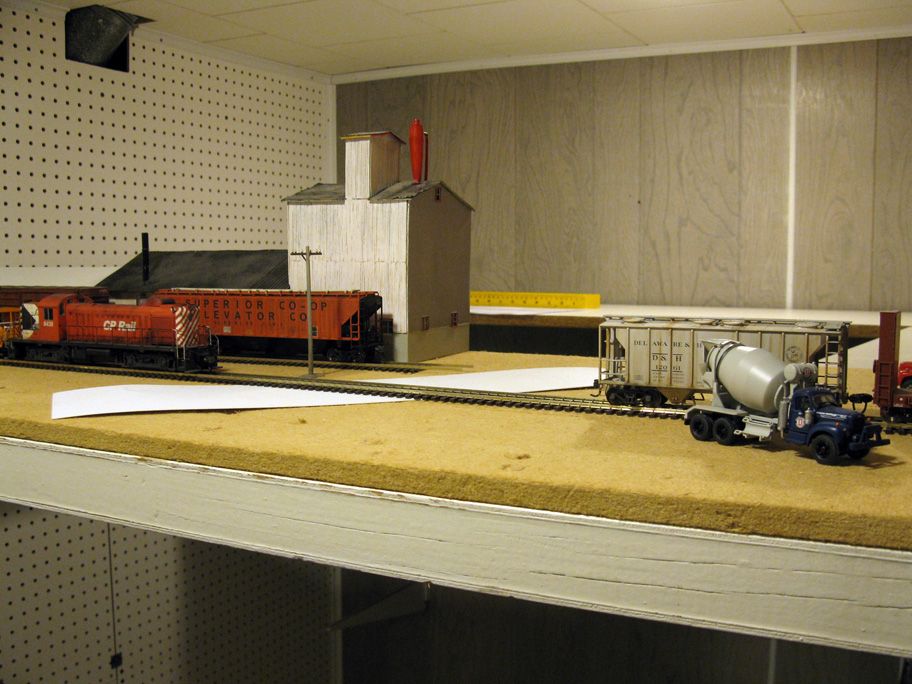
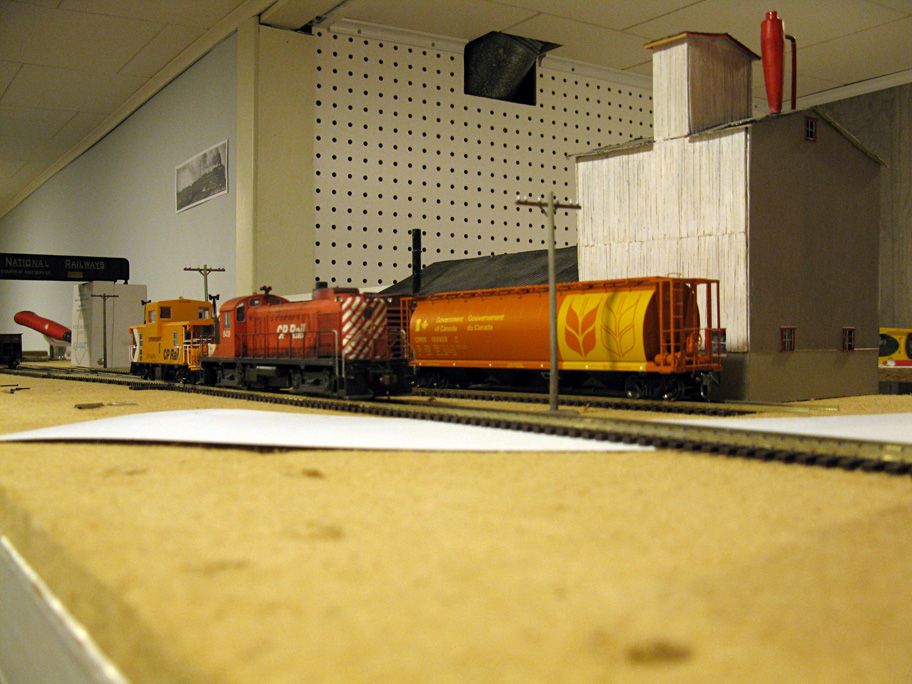
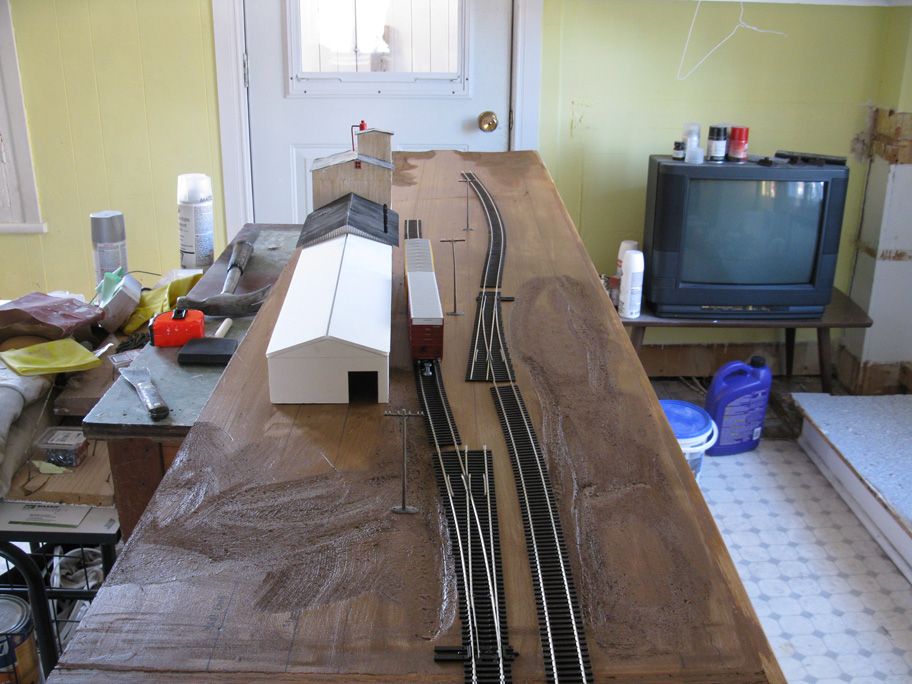
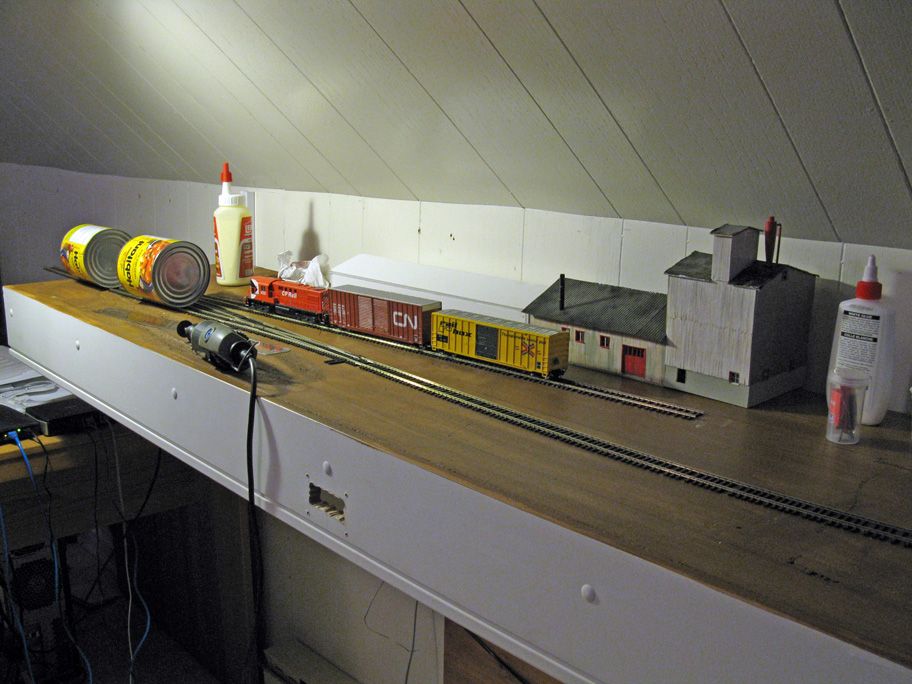
The design was quite straightforward. Instead of wasting time working at my computer, I took flex track and a couple of Peco code 83 #8 turnouts (I just love those long realistic turnouts!) and played with them until I found a satisfying track arrangement. It took about 5 minutes! I added a few buildings, mainly my old scratchbuilt feedmill built when I was a teenager in the late 1990s. Everything looked balanced, believeable and realistic. I felt I was along some track in Southern Quebec, probably somewhere on good ol' Quebec Central in Beauce.


I also decided to definitely apply the proverbial "less is more" approach, as I explained in a previous post recently. That means:

-A realistic and simple track plan offering operation potential consistent with my own interest (small local trains).
-Small square footage to fit my office room at home (80" x 18") and that can be moved in my workshop or outdoor when I need to do messy stuff.
-A scene that can be built by phase and rebuilt at wish
-The use of readily available component (already built module, available track & buildings)
-Locate the layout in my living space to be sure it will be fun to work on it in optimal conditions and not in my damp and cold basement, nor my uncomfortable workshop.

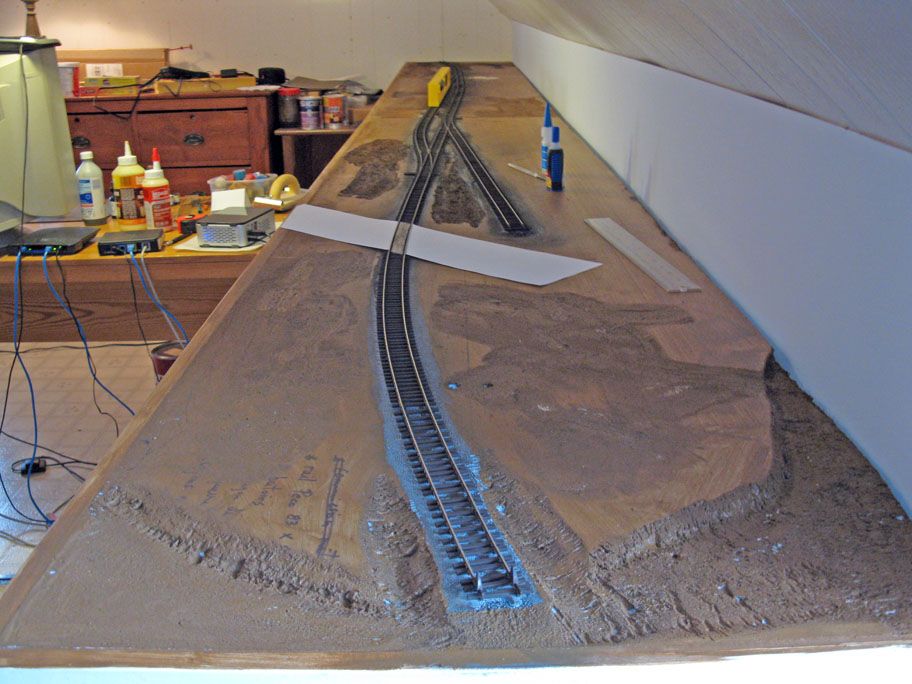
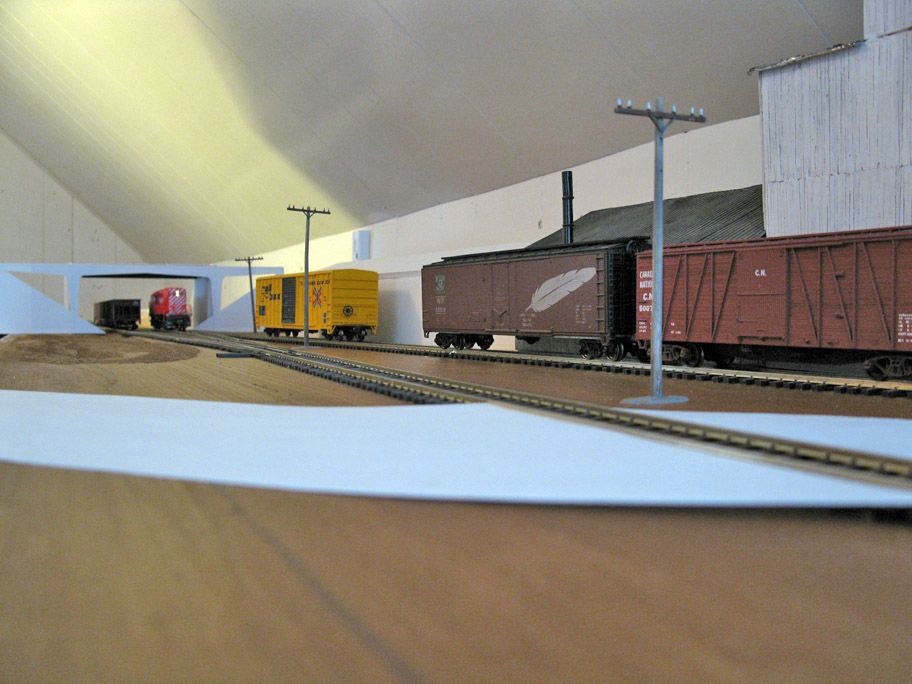
The result was a spartan track plan, just like the real thing. I wanted to model a end of line station, as Trevor Marshall's Port Rowan layout. Why? I once tried the inglenook, very interesting concept but I felt there lacked a sense of destination. With a terminal, you train comes from staging, do its chores, and then disappears from where it came.


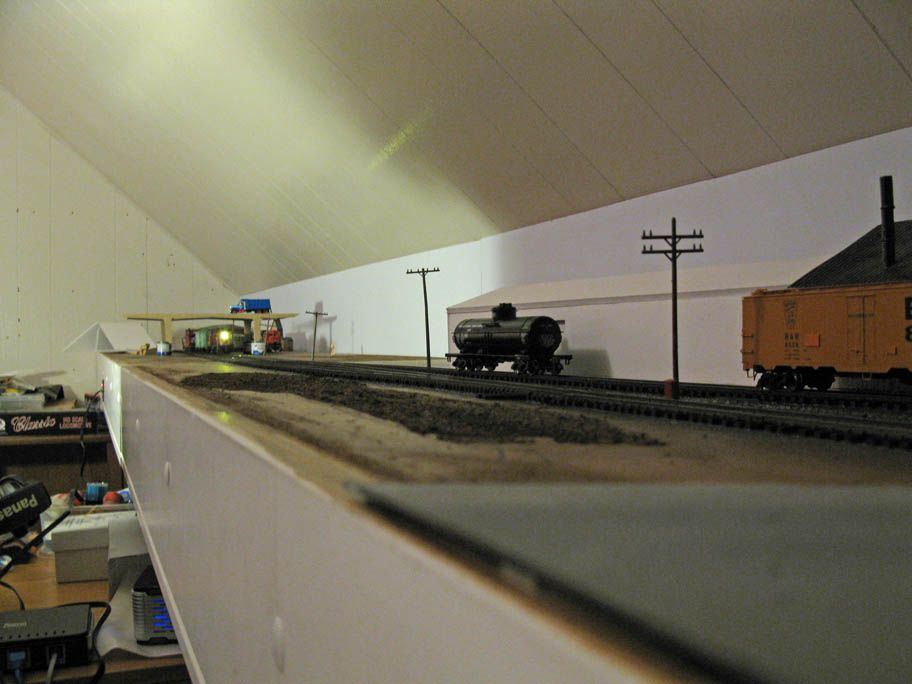
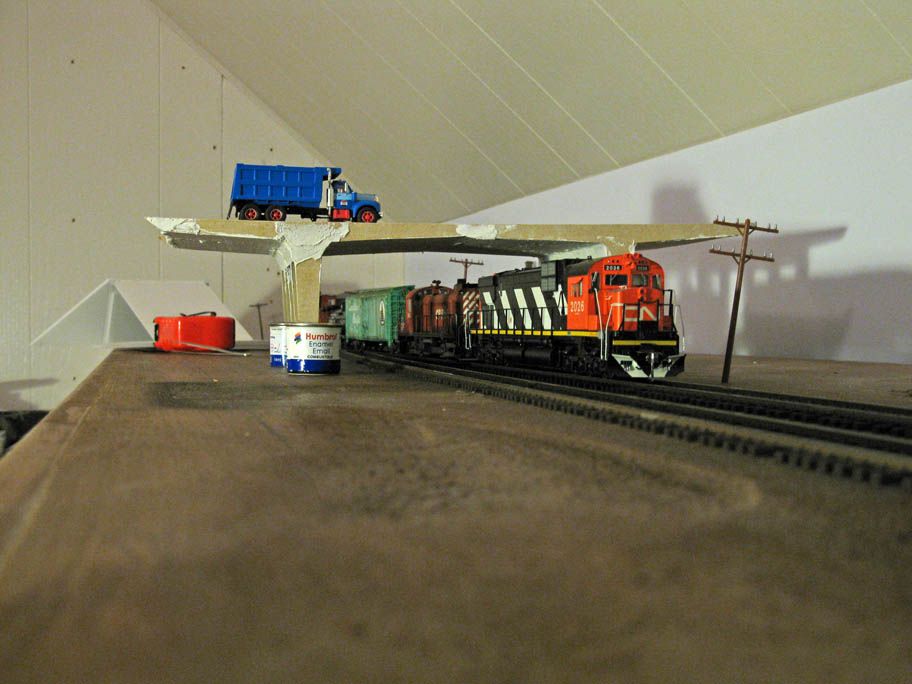
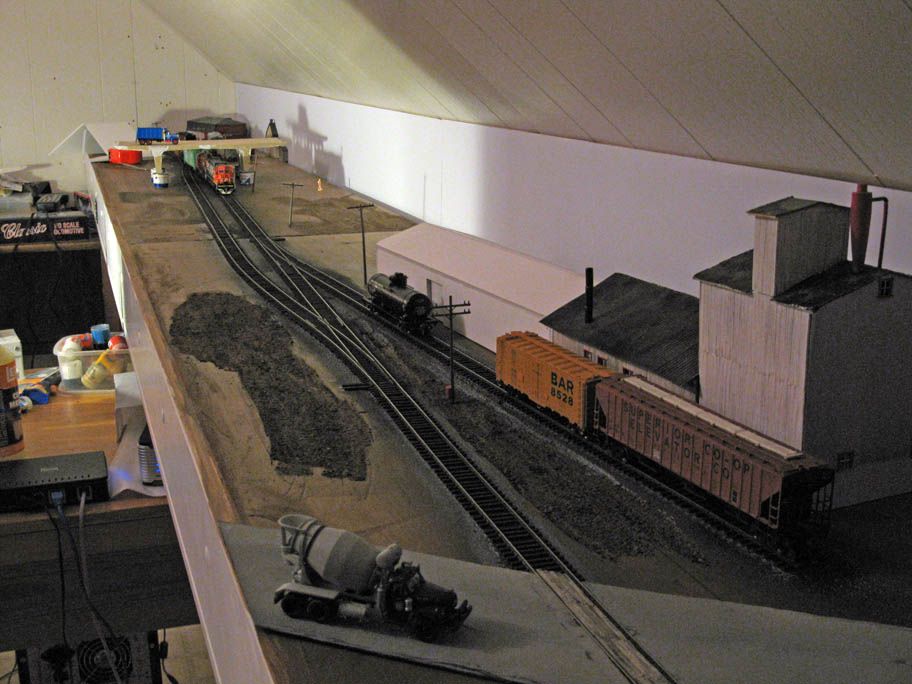
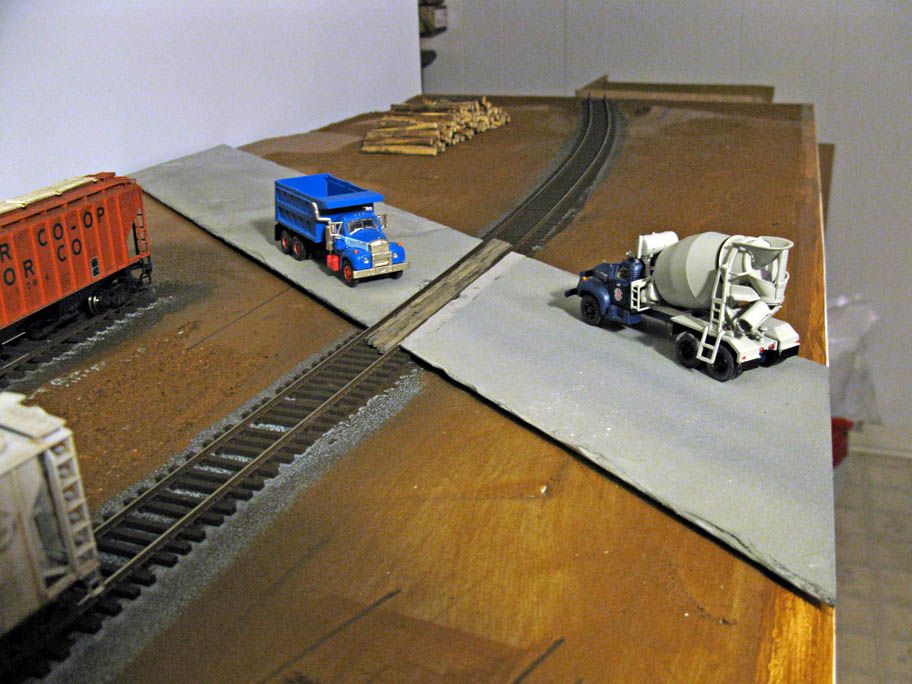
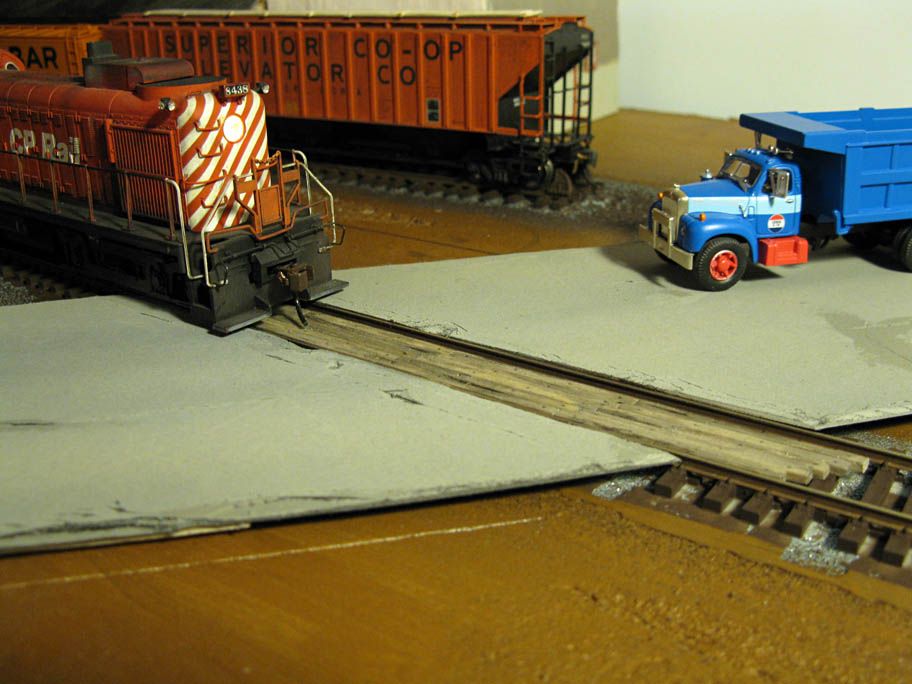
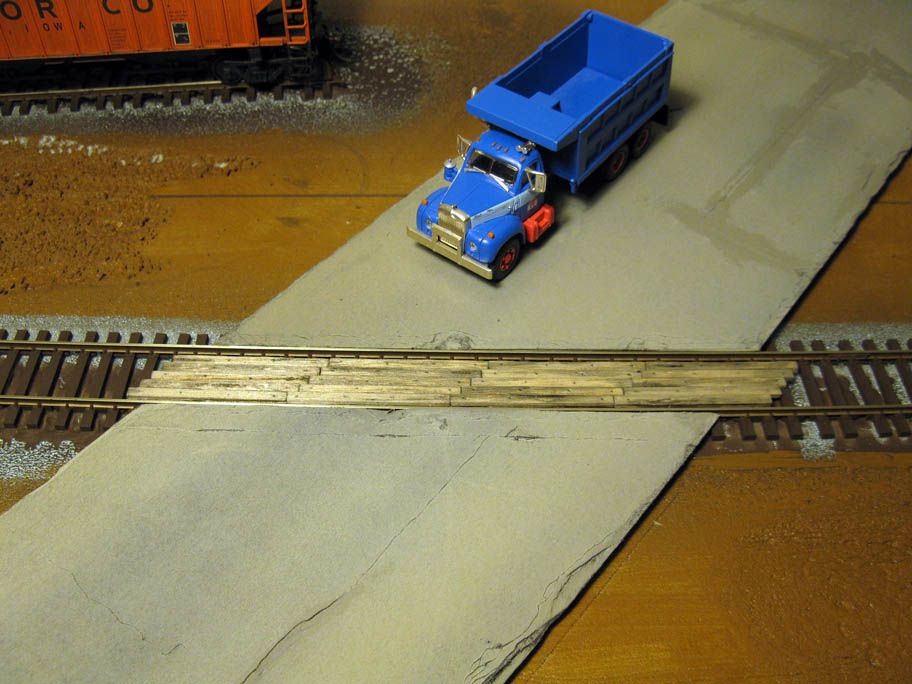
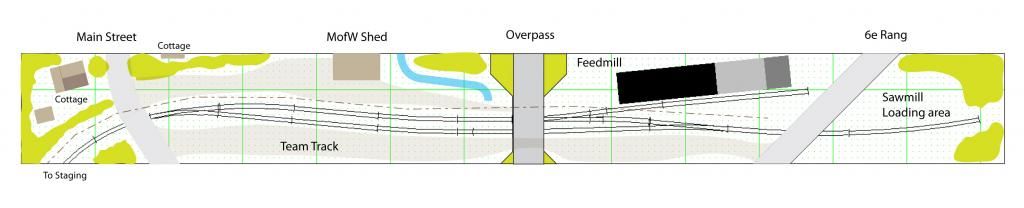
Imagine a small branchline, it's the end of steel there. There's a small runaround siding to reverse train and do some switching moves. From the main line, a siding serves the feedmill. Finally, the track beyond the runaround continue a few hundred feets untiil it disappear into a forest area. Beyond that point, the main line had been pull out and the remaining track is now used as a team track for local customers, including a sawmill.

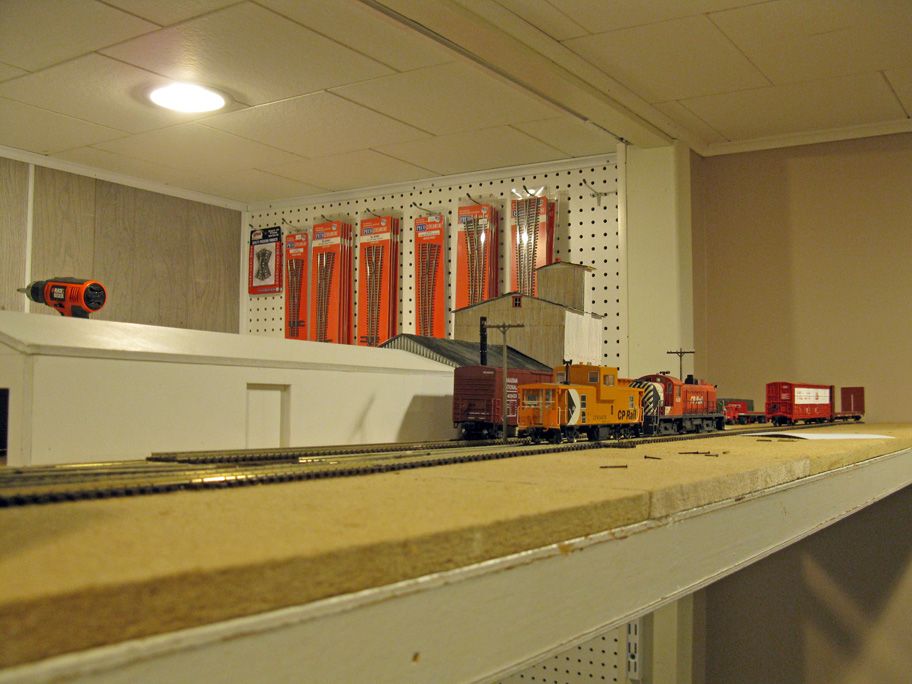
Two turnouts are on the layout, the third one on a removable cassette, meaning only half the runaround is properly modelled. In the future, it could be possible to extend the layout to model completely the runaround and the station. I can also extend the mainline beyond the team track to effectively model the sawmill operation. No new turnouts would be needed. IF I had more place, I wouldn't even bother adding more track and I would probably just add a few feets of mainline between a staging area and the station. In that respect, I'm following a method of building layout directly inspired by works of talented UK-based modellers Chris Nevard who never ceased to impress me everything I see his amazing work.

As for the locale, I found out St. Pamphile, QC, in Bellechasse county was extremely similar to the fictious location I created. Better, it was supposed to be a terminus on Quebec Central's Chaudière Sub during the 1910s, however, the last remaining 25 miles were never built because of WWI, which means I can absolutely proto-freelance the remaining miles according to my own ideas.

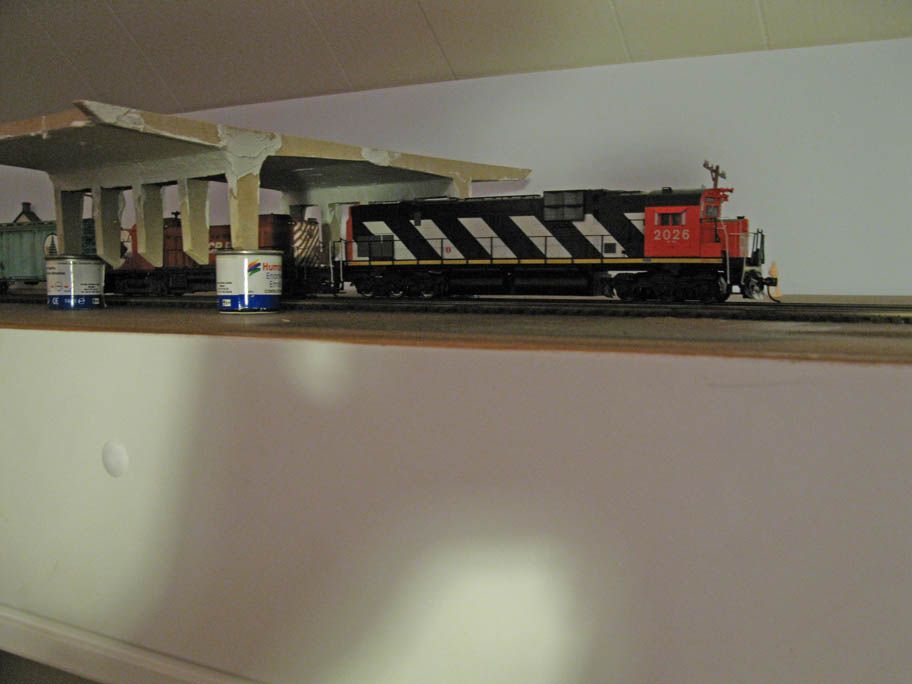
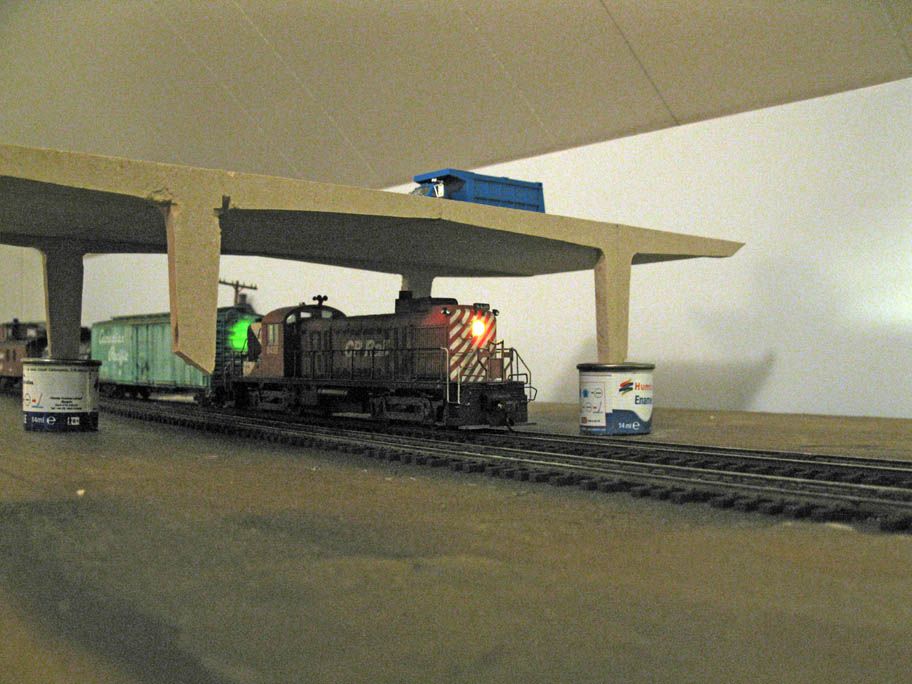
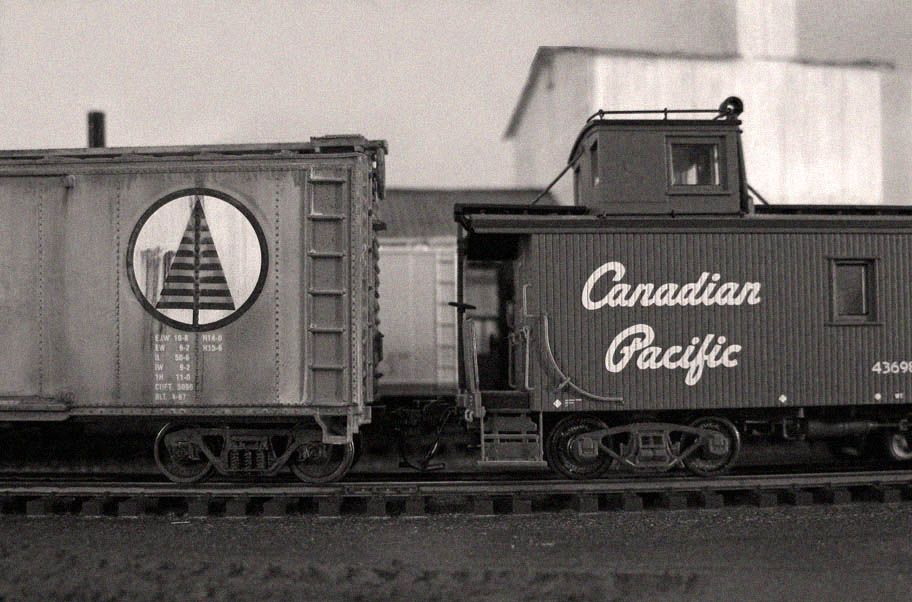
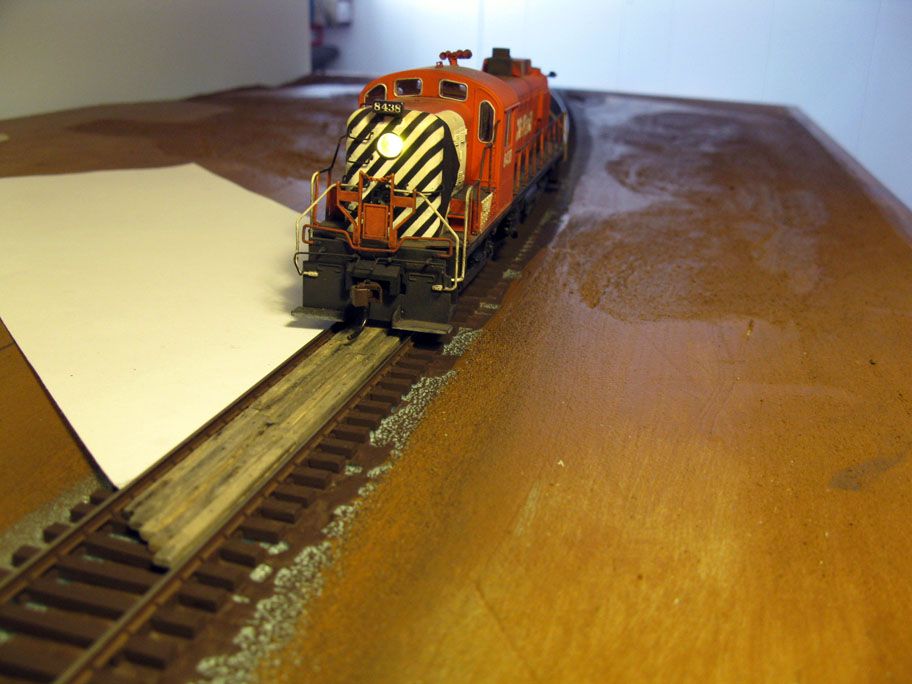
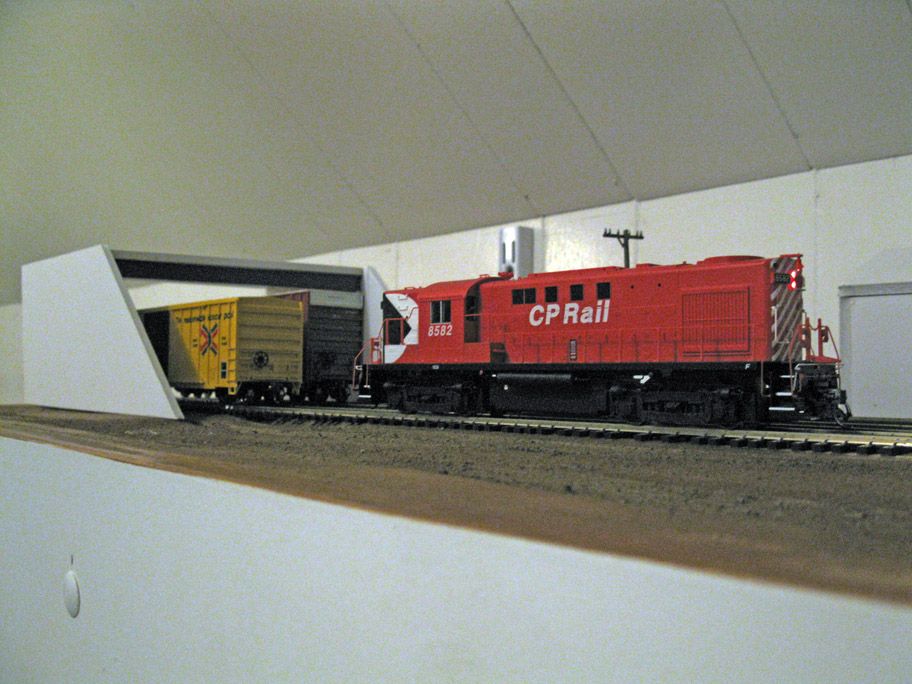
The layout will be set in a mid-1980s setting, with first generation diesel (Alco-MLW and EMD) working the line. In fact, the scene is quite generic and could accommodate almost anything, which is good to make nice photo shots of my locomotive collection. Anyway, I'm not a bif Canadian Pacific fan, but I do have a soft spot for CP Rail and Multimark, probably a remnant from my first trainset.

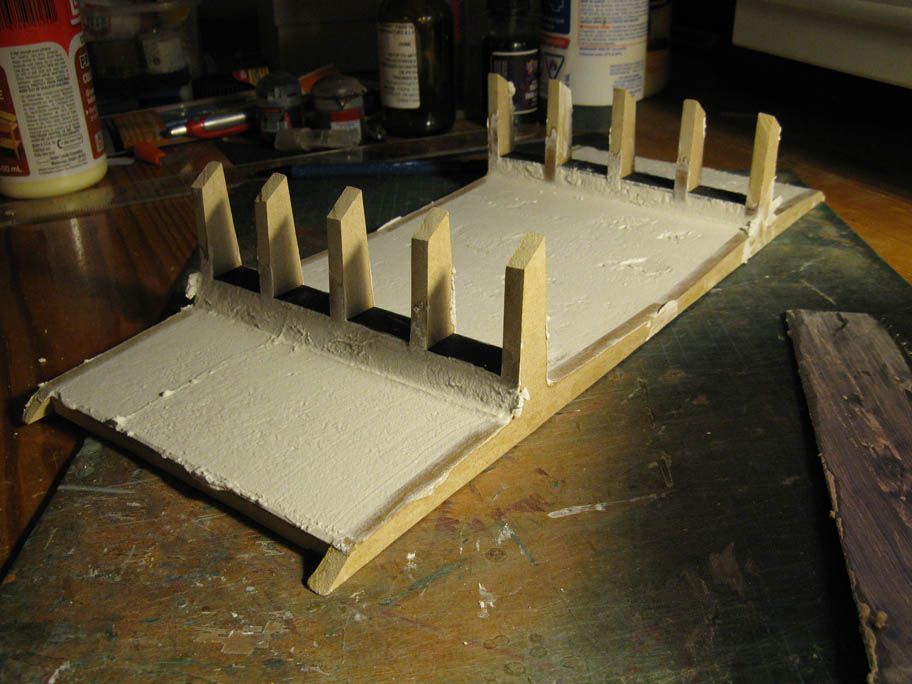
And so far, so good. During the weekend, I managed to install my NCE Power Cab DCC throttle, add some ondulations to the styrofoam baseboard and paint the module.


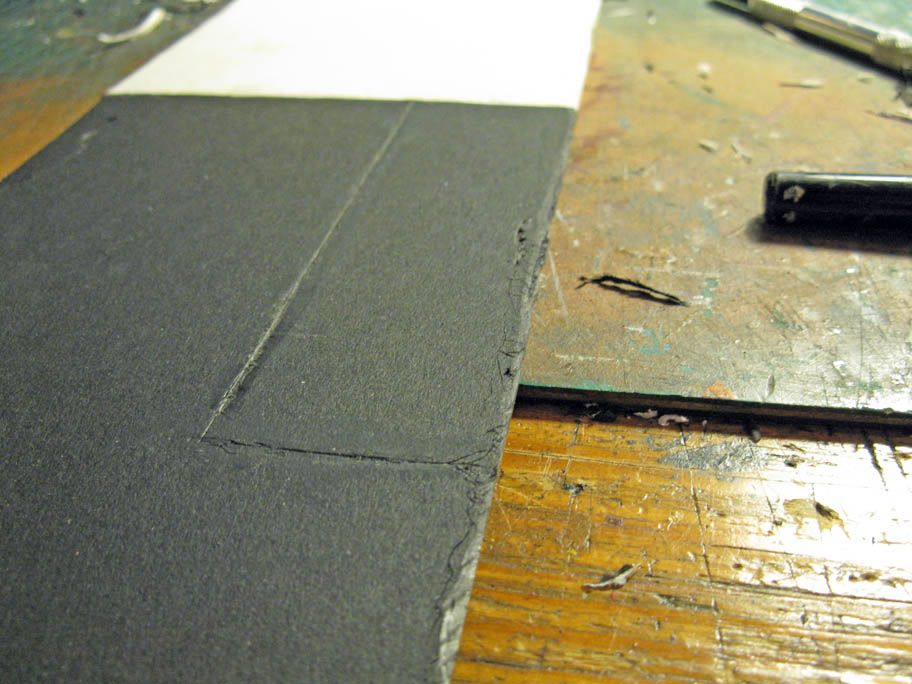
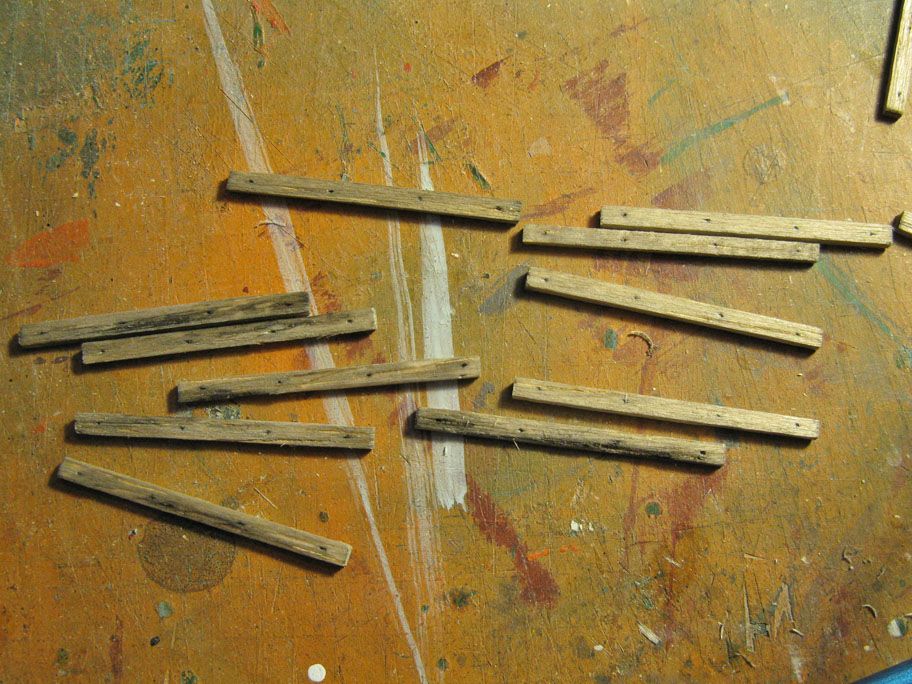
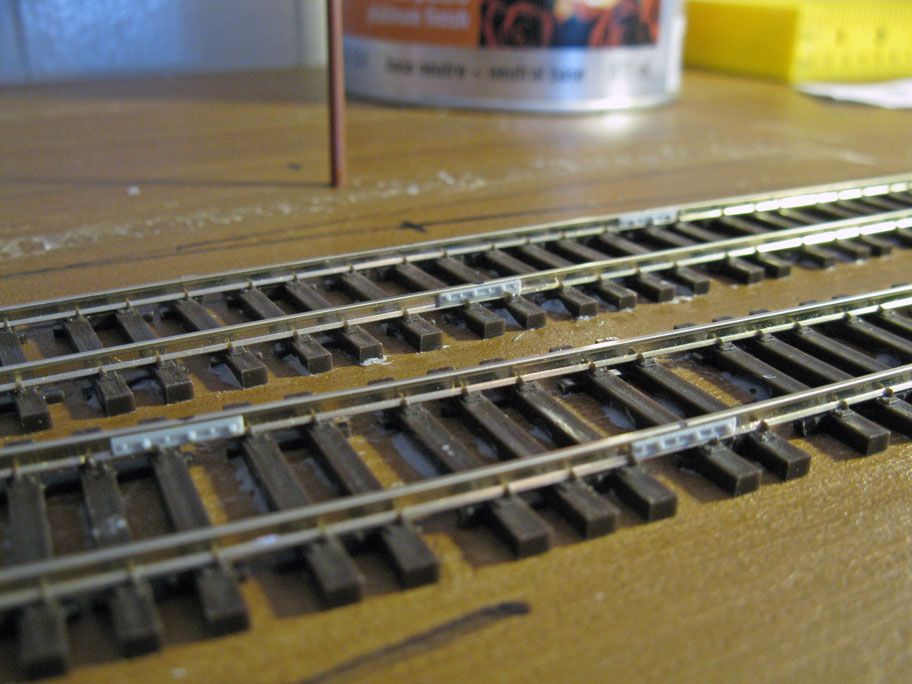
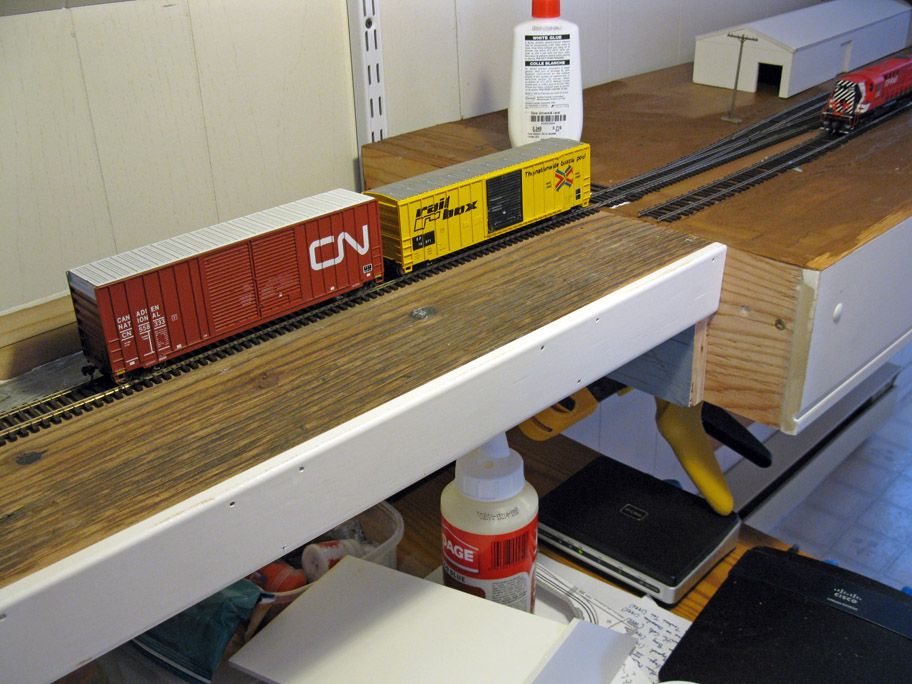
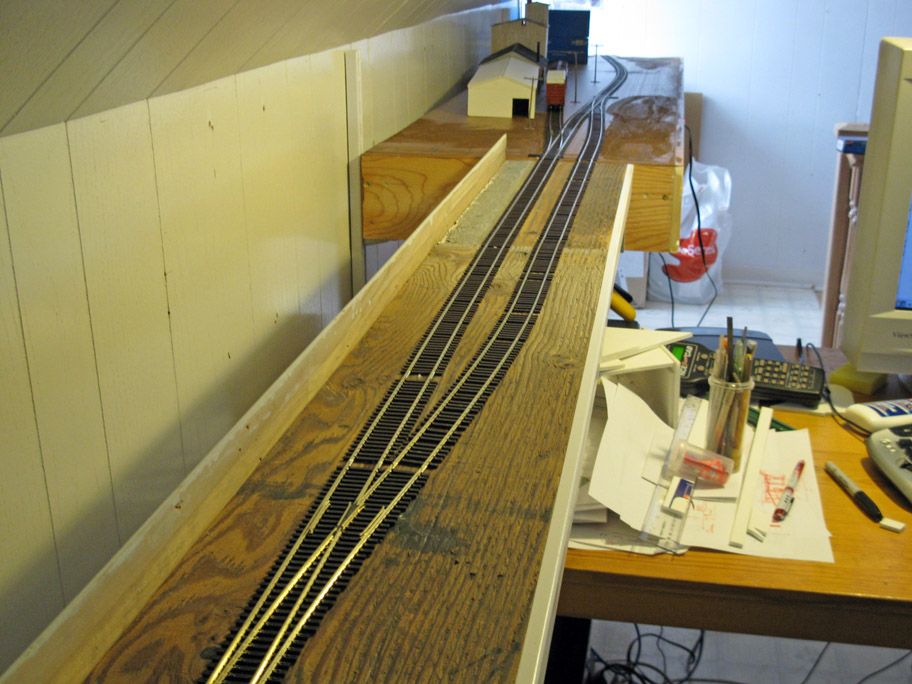
Yesterday, I prepared the flex track by removing a few ties (1 out of 6) and randomly spacing the remaining ties to get a more realistic branchline look.Tonight, it took me about 2 hours to lay and glue the tracks and drill holes for electric feeders. Honestly, I like how task can be done almost one shot in a ver short span of time. It remembers me what my golf teacher in CEGEP (College) told us: "always complete a session with a winning move to feel you are moving toward your goal". I always thought he was quite right...

Track is laid. I'll solder the feeders tomorrow.