After a few days pondering about a track plan, I came to narrow down ideas to a single concept based on ex-Maine Central "Hereford Railway" between Beecher Falls, VT and Dudswell Jct, QC. The line was bought and operated by Canadian Pacific in the late 20s. Quickly, that anemic line was cut off and ended its life as a small decrepit branchline called the Sawyerville Subdivision. Hereford Railway was famous for the raspberries growing along its embankment and got the nickname "The Raspberry Branch". When I railfanned the area last summer, I had the occasion to feed myself on many of those raspberry along CMQ tracks at Cookshire.
In real life, the deal with CPR was that it would keep the line from Cookshire to Malvina, QC. The few miles between Beecher Falls and Malvina were quickly pulled off. In my proto-freelanced layout, CPR kept the connection to Beecher Falls and Maine Central kept running rights up to CPR's International of Maine in Cookshire. Since Malvina was the therminal for CPR local trains, a small steam locomotive facility and a turntable were built.
Historically, Hereford Railway heavily relied on lumber products to get revenue. Old topographic maps show many small stations with a siding called "Camp no.X". For this reason, I decided Malvina would get a small spur leading to a sawmill. The other industry is a feed mill which is also a coal/oil dealer. Finally, there's a small team track by the station were you can find a cattle pen. Cattle pens were once a staple of Quebec rural stations up to the 60s. They were virtually anywhere.
The layout is based on a standard 4' x 8' plywood sheet. My goal is to make this a realistic continuous running switching layout. To achieve this goal, I decided to only model the town of Malvina. Beecher Falls and Cookshire will be staged. The top level will represent the station and local industries while the lower level will provide staging and continuous run. The stretch of track going down on the other side of the layout will represent a steep 3% grade along "Raspberry Hill".
From an operation point of view, it will be possible to run the local mixed train to Malvina, but also several other run-through faster trains. The long siding will make it possible to stage trains meeting there and getting their order to continue.
Saturday, November 21, 2015
Quebec South Shore Railway Mark II
As some of you may know, the layout is partially gone. Some home improvement required to dismantle it and I know longer have the luxury to have a layout in that room.
However, some space in the basement makes me able to move forward. I'm actually building a 4' x 8' table out of junk wood that will serve as a starting base (more on that later).
Building and operating the original QSSR layout was an excellent way to better understand my needs.
On the positive side, I found out a single turnout layout was more than enough to sustain enjoyable and realistic operation for a decent amount of time. Also, I may now confirm I love to model rural town and that kind of railroad traffic. I grew up in a small rural community and it's impossible to sever these natural ties.
On the negative side, I discovered I like my trains to travel some scenery before doing their switching chores. Honestly, I hated the way a staged train could would enter the scene. I was blinded by the fact our club layout - Hedley-Junction - is quite large and continuous running isn't required to get the feel you are going somewhere.
It was also quite evident I like to sit down and watch my trains run freely in nice landscape. I've always been a model railfan since my younger years. I would put my eyes at track level and watch the train run over and over for hours. To me, it wasn't silly. It was a thrill. I want it back!
Meanwhile, I enjoyed reading some recent blog posts made by Lance Mindheim. Isn't doing nothing exciting right now, but his insights about his customers is highly interesting. Two things struck me as essential: doing what you like (sounds cheesy, but any model railroader knows the dreadfulness of getting side tracked) and to see "poverty" as a blessing.
As you know, Hedley-Junction is now set firmly in modernity... a.k.a the mid-80s. That means a LOT of rolling stock and locomotives I own are now totally obsolete. And Canadian Pacific is now totally out of the picture. At the same time, canadian dollars took a serious plunge during the last year and new stuff is now unaffordable. I scavenge and upgrade everything I can and the process is actually fun, rewarding and help to develop skills.
The New QSSR
The new layout draw inspiration from many railfan trips in Quebec's Eastern Township, a well-known area with strong railway action. Canadian Pacific was the driving force there until the 80s.
I'm keeping the grain elevator/feed mill theme. However, since the layout is now set in the 50s, I'll will add a small engine facilities, a station and a team track.
The big challenge is to make a realistic switching layout out of a 4' x 8' sheet of plywood. There's been a lot of badmouthing about that kind of layout plan. But honestly, I can't put the layout on any wall. A shelf layout would be better, but I just can't fit that geometry. I'm left with an island model railroad. And no, it's not that bad since I want continuous running.
The track plan is a classic twice around and by pure coincidence, the track plan ended up similar to John Allen's original Gorre & Daphetid! Well, there's a thousand solution.
At first, I thought I would make the twice around run over the mainline and cross it with a trestle. But some 3D modelling quickly convinced me it would be toyish and not practical to operate at eye level. So I now settled with a subterranean loop. It leaves more space for the town scene but also makes more sense. There's a lot of embankment and cut in the Eastern Township. I'll now have the occasion to model it realistically without have a Rockies look.
Inspiration
Inspiration is drawn from many southern Quebec localities served by CPR: Waterloo, Eastman, Magog and Cookshire. Many of them had strong topographic features, interesting track arrangement and very small turntable.
This proto-freelanced road will be quite similar to the ex-Maine Central's Raspberry Branch in Cookshire that was operatd by CPR after 1927.
Also, Trevor Marshall's S scale Port Rowan layout is a big influence on me. Getting that low track density out of a twice around will prove to be quite a challenge.
However, some space in the basement makes me able to move forward. I'm actually building a 4' x 8' table out of junk wood that will serve as a starting base (more on that later).
Building and operating the original QSSR layout was an excellent way to better understand my needs.
On the positive side, I found out a single turnout layout was more than enough to sustain enjoyable and realistic operation for a decent amount of time. Also, I may now confirm I love to model rural town and that kind of railroad traffic. I grew up in a small rural community and it's impossible to sever these natural ties.
On the negative side, I discovered I like my trains to travel some scenery before doing their switching chores. Honestly, I hated the way a staged train could would enter the scene. I was blinded by the fact our club layout - Hedley-Junction - is quite large and continuous running isn't required to get the feel you are going somewhere.
It was also quite evident I like to sit down and watch my trains run freely in nice landscape. I've always been a model railfan since my younger years. I would put my eyes at track level and watch the train run over and over for hours. To me, it wasn't silly. It was a thrill. I want it back!
Meanwhile, I enjoyed reading some recent blog posts made by Lance Mindheim. Isn't doing nothing exciting right now, but his insights about his customers is highly interesting. Two things struck me as essential: doing what you like (sounds cheesy, but any model railroader knows the dreadfulness of getting side tracked) and to see "poverty" as a blessing.
As you know, Hedley-Junction is now set firmly in modernity... a.k.a the mid-80s. That means a LOT of rolling stock and locomotives I own are now totally obsolete. And Canadian Pacific is now totally out of the picture. At the same time, canadian dollars took a serious plunge during the last year and new stuff is now unaffordable. I scavenge and upgrade everything I can and the process is actually fun, rewarding and help to develop skills.
The New QSSR
The new layout draw inspiration from many railfan trips in Quebec's Eastern Township, a well-known area with strong railway action. Canadian Pacific was the driving force there until the 80s.
I'm keeping the grain elevator/feed mill theme. However, since the layout is now set in the 50s, I'll will add a small engine facilities, a station and a team track.
The big challenge is to make a realistic switching layout out of a 4' x 8' sheet of plywood. There's been a lot of badmouthing about that kind of layout plan. But honestly, I can't put the layout on any wall. A shelf layout would be better, but I just can't fit that geometry. I'm left with an island model railroad. And no, it's not that bad since I want continuous running.
The track plan is a classic twice around and by pure coincidence, the track plan ended up similar to John Allen's original Gorre & Daphetid! Well, there's a thousand solution.
At first, I thought I would make the twice around run over the mainline and cross it with a trestle. But some 3D modelling quickly convinced me it would be toyish and not practical to operate at eye level. So I now settled with a subterranean loop. It leaves more space for the town scene but also makes more sense. There's a lot of embankment and cut in the Eastern Township. I'll now have the occasion to model it realistically without have a Rockies look.
Inspiration
Inspiration is drawn from many southern Quebec localities served by CPR: Waterloo, Eastman, Magog and Cookshire. Many of them had strong topographic features, interesting track arrangement and very small turntable.
This proto-freelanced road will be quite similar to the ex-Maine Central's Raspberry Branch in Cookshire that was operatd by CPR after 1927.
Also, Trevor Marshall's S scale Port Rowan layout is a big influence on me. Getting that low track density out of a twice around will prove to be quite a challenge.
Tuesday, May 12, 2015
Limited Space Prototypes
Moulée St-Pie Inc. in Saint-Pie, Quebec, on old Montreal Maine & Atlantic defunct branch between Farnham and Ste-Rosalie (former CPR) is a great source of inspiration.
This small locality is served by 2 unusually located feedmill and elevator built in the middle of the town. One of them, the oldest, is built tightly against the mainline. This is what I'd like to reproduce on the layout.
The space between the building and the right of way limit is about 55 feets, thus 7-1/2" in HO. Walthers Farmers Coop elevator is about 4-1/4" deep, so it bring the total layout to about 12" wide. That means my earlier estimates were right.
On the prototype, a nice and tall hedge is growing along the track which could provide visual interest.
At this point, I consider I've planned enough the layout. No need to go further, only a real mock up with tracks, structures and freight cars will help me to find the best balance for this scene.
This small locality is served by 2 unusually located feedmill and elevator built in the middle of the town. One of them, the oldest, is built tightly against the mainline. This is what I'd like to reproduce on the layout.
The space between the building and the right of way limit is about 55 feets, thus 7-1/2" in HO. Walthers Farmers Coop elevator is about 4-1/4" deep, so it bring the total layout to about 12" wide. That means my earlier estimates were right.
On the prototype, a nice and tall hedge is growing along the track which could provide visual interest.
At this point, I consider I've planned enough the layout. No need to go further, only a real mock up with tracks, structures and freight cars will help me to find the best balance for this scene.
A new approach
As previously stated, I'm interested in experimenting with IKEA shelves for my next module. To maximize my investment, I decided to build only one module and not two. First, it cost less. And you don't have to handle annoying scenery and electrical gap.
The Ikea shelf is 74 inches long by 10 inches width. Not very large, but enough to get a decent elevator scene. 10 inches isn't enough to develop a deep enough scene. Track clearance and security margins aren't good enough. On the other hand, I don't want to get a shelf to width because in will induce more forces and risk of sagging. I consider 12 inches to be a good average. Also, I'm seriously thinking about bashing my old Walthers elevator. My previous structure was about 5 inches width. The elevator is about 4.25 inches.
Having operated QSSR a few times last year, I know the main issue was the fact sidings and "yard lead" were too short to make switching moves easier. That doesn't mean switching will be "easy", but only that I won't have to make a ridiculous and irrealistic amount of useless moves. It may sounds stupid, but being artificially forced to do irrelevant things is the saddest thing in existence!
I feel we always under estimate a siding length. We probably inherited it from our spagetthi bowl design or oter contrived conceptual ideas. A siding shouldn't always be the required lenght to handle a definite number of car spots. In fact, we operating, you need extra space to store cars while performing a vast array of moves.
How does it materialize with my design? I placed the turnout on the amovible cassette. Yes, a zero-turnout module. Nothing less, nothing more. Not only it gives me long and realistic sidings, but I don't have to care about scenicking or painting the turnout (which can be really tiring). Also, having the turnout in the clear makes it possible to scenic the foreground with trees and bushes to "hide" the place where the trains coming from.
Building this layout will be easy as one-two-three. I don't plan feeding the rail underneat the layout. Instead, the very few wires required will be buried into trenches dug out on the styrofoam slab. As a lighting valence, I'll use another IKEA shelf with LED fixture for cabinets installed under it. Backdrop will be a photo of a generic and suitable countryside scene mounted on a lightweight board. It could be a 1/8" masonite or a 1/4" foamcore. I could also be possible to just tack the photograph on the wall. I'll see when I'll be there.
The Ikea shelf is 74 inches long by 10 inches width. Not very large, but enough to get a decent elevator scene. 10 inches isn't enough to develop a deep enough scene. Track clearance and security margins aren't good enough. On the other hand, I don't want to get a shelf to width because in will induce more forces and risk of sagging. I consider 12 inches to be a good average. Also, I'm seriously thinking about bashing my old Walthers elevator. My previous structure was about 5 inches width. The elevator is about 4.25 inches.
Having operated QSSR a few times last year, I know the main issue was the fact sidings and "yard lead" were too short to make switching moves easier. That doesn't mean switching will be "easy", but only that I won't have to make a ridiculous and irrealistic amount of useless moves. It may sounds stupid, but being artificially forced to do irrelevant things is the saddest thing in existence!
I feel we always under estimate a siding length. We probably inherited it from our spagetthi bowl design or oter contrived conceptual ideas. A siding shouldn't always be the required lenght to handle a definite number of car spots. In fact, we operating, you need extra space to store cars while performing a vast array of moves.
How does it materialize with my design? I placed the turnout on the amovible cassette. Yes, a zero-turnout module. Nothing less, nothing more. Not only it gives me long and realistic sidings, but I don't have to care about scenicking or painting the turnout (which can be really tiring). Also, having the turnout in the clear makes it possible to scenic the foreground with trees and bushes to "hide" the place where the trains coming from.
Building this layout will be easy as one-two-three. I don't plan feeding the rail underneat the layout. Instead, the very few wires required will be buried into trenches dug out on the styrofoam slab. As a lighting valence, I'll use another IKEA shelf with LED fixture for cabinets installed under it. Backdrop will be a photo of a generic and suitable countryside scene mounted on a lightweight board. It could be a 1/8" masonite or a 1/4" foamcore. I could also be possible to just tack the photograph on the wall. I'll see when I'll be there.
The structures will be scratchbuilt and kitbashed from stuff I already own. If you are skeptic about such a diminutive layout, just Google "Logansport and Indiana Northern". This layout really show how a generic elevator scene can have character.
In the end, this layout will have at least 5 car spots (even more in fact) and the possibility to handle 5-car long trains with a caboose. Not too bad for a 74" long board.
Sunday, May 10, 2015
IKEA Shelf Layout System
I've tried to build many layouts in this room and all failed because they were too bulky. I feel using the usual shelf layout recipe is a no go for me. Also, I don't want to drill too much holes in my freshly restored office.
Well, while browsing the IKEA catalog to find suitable shelves for a display in my refurbished room, I found out a cheap shelf with concealed bracket caller LACK. They are available in 74" and 43" lenght and 14" deep. They can support upto 30 lbs of weight, which is more than enough for a shelf layout.
When you think about the cost of shelves brackets and hollow core doors, the IKEA option is tremendously cheaper and easier to implement. Better, it looks good from the start and it's bullet proof to implement. After doing a few researches over the web, I found out quickly I wasn't the only soul out there to have seen the potential of this system. 20$ for a layout benchwork, it's hard to beat. This interesting thread on Atlas Forum gives some insight about using the LACK shelves.
For my the St-Pamphile module, I seriously thinking about rebuilding it from scractch. Not a big deal. The original module weight a ton, is bulky and well, not in great shape after it got covered under junk in the damp basement. For my purpose, I would use two 43" LACK shelves and glue 1" thick styrofoam plank on it. Adding a thin MDF fascia should do the job, bring the entire modules a 3" high. I prefer to handle smaller modules than a very large one. If I need to do dirty work on a module, I can take it outside. I will also need a 54" long amovible cassette to do switching moves.
When I rebuilt the wall, I took care to place a full 3/4" plywood sheet beneath the wainscot. My house was build in 1875, so forget about your usual 16" spaced wood stud. Walls are made of superposed 3"x12" lumbers. So no need to fear shelf brackets won't have solid backing to support themselves.
About the layout itself, I'm seriously thinking about adding a 12" additional length to the original feedmill siding. It will allow me to store cars and do more switching moves. It was a shortcoming I identified on the first version of this layout.
Also, I'm seriously thinking about using my four large Walthers grain bins I purchased in the past and which never saw a real use. It would be a nice addition to have them beside the feedmill and represent a modernized industry as can be seen in Cookshire, Quebec (old CPR Short Line, now CMQ) or in Clermont on ex-CN Murray Bay Subdivision. Walthers bins are a little bit large, I must agree. I'll have to mock up the structures to make sure they work together. If not, I'll probably have to build new ones from scratch.
Well, while browsing the IKEA catalog to find suitable shelves for a display in my refurbished room, I found out a cheap shelf with concealed bracket caller LACK. They are available in 74" and 43" lenght and 14" deep. They can support upto 30 lbs of weight, which is more than enough for a shelf layout.
When you think about the cost of shelves brackets and hollow core doors, the IKEA option is tremendously cheaper and easier to implement. Better, it looks good from the start and it's bullet proof to implement. After doing a few researches over the web, I found out quickly I wasn't the only soul out there to have seen the potential of this system. 20$ for a layout benchwork, it's hard to beat. This interesting thread on Atlas Forum gives some insight about using the LACK shelves.
For my the St-Pamphile module, I seriously thinking about rebuilding it from scractch. Not a big deal. The original module weight a ton, is bulky and well, not in great shape after it got covered under junk in the damp basement. For my purpose, I would use two 43" LACK shelves and glue 1" thick styrofoam plank on it. Adding a thin MDF fascia should do the job, bring the entire modules a 3" high. I prefer to handle smaller modules than a very large one. If I need to do dirty work on a module, I can take it outside. I will also need a 54" long amovible cassette to do switching moves.
When I rebuilt the wall, I took care to place a full 3/4" plywood sheet beneath the wainscot. My house was build in 1875, so forget about your usual 16" spaced wood stud. Walls are made of superposed 3"x12" lumbers. So no need to fear shelf brackets won't have solid backing to support themselves.
![]() |
| Updated track plan |
About the layout itself, I'm seriously thinking about adding a 12" additional length to the original feedmill siding. It will allow me to store cars and do more switching moves. It was a shortcoming I identified on the first version of this layout.
Also, I'm seriously thinking about using my four large Walthers grain bins I purchased in the past and which never saw a real use. It would be a nice addition to have them beside the feedmill and represent a modernized industry as can be seen in Cookshire, Quebec (old CPR Short Line, now CMQ) or in Clermont on ex-CN Murray Bay Subdivision. Walthers bins are a little bit large, I must agree. I'll have to mock up the structures to make sure they work together. If not, I'll probably have to build new ones from scratch.
Saturday, May 9, 2015
A Reboot?
It's been a year since this project have been put aside. It was the time to restore my office room to its former late 19th century splendor.
I now have the time and place to reboot this project again. This time, I'll make it simpler. When I stored the layout, I ripped the turnout because I needed them for the club layout. Thus, I have to rebuild the track again. However, I'm planning to build a one-turnout layout since operation in St. Pamphile is going to be spartan. I remember Lance Mindheim's article about that in MRH last year. I really think, for a small home layout, it is the way to go.
My idea is that I don't need that much a runaround. Also, I'd like the idea the railway company came and ripped off the unused turnouts to rebuild where they were needed, just like the real prototypes do.
On another hand, I have 4 Walthers grain silo doing nothing except gathering dust. I willing to use them to modernized and enlarge my feedmill so it looks like an industry big enough to sustain minimal freight traffic.
Now, at this point, I'm thinking about what I'll do with the benchwork. I'd like it to be less bulky, but maybe I'll keep it as is.
Also, the layout will be much shorter. It used to be 13 feet long. Not it will be 9 feet long with a removable 3 feet cassettes. It will make operation a little bit more tricky, but that's fine with me. In fact, today I was talking with Stéphan Vachon from Sartigan Railway and he was retelling stories of switching puzzles he had to solve when he had to handle more cars than his sidings could handle.
Stay tune. By the way, remember this project is mainly done to learn and try new technics.
I now have the time and place to reboot this project again. This time, I'll make it simpler. When I stored the layout, I ripped the turnout because I needed them for the club layout. Thus, I have to rebuild the track again. However, I'm planning to build a one-turnout layout since operation in St. Pamphile is going to be spartan. I remember Lance Mindheim's article about that in MRH last year. I really think, for a small home layout, it is the way to go.
My idea is that I don't need that much a runaround. Also, I'd like the idea the railway company came and ripped off the unused turnouts to rebuild where they were needed, just like the real prototypes do.
On another hand, I have 4 Walthers grain silo doing nothing except gathering dust. I willing to use them to modernized and enlarge my feedmill so it looks like an industry big enough to sustain minimal freight traffic.
Now, at this point, I'm thinking about what I'll do with the benchwork. I'd like it to be less bulky, but maybe I'll keep it as is.
Also, the layout will be much shorter. It used to be 13 feet long. Not it will be 9 feet long with a removable 3 feet cassettes. It will make operation a little bit more tricky, but that's fine with me. In fact, today I was talking with Stéphan Vachon from Sartigan Railway and he was retelling stories of switching puzzles he had to solve when he had to handle more cars than his sidings could handle.
Stay tune. By the way, remember this project is mainly done to learn and try new technics.
Wednesday, May 7, 2014
On The Road Again...
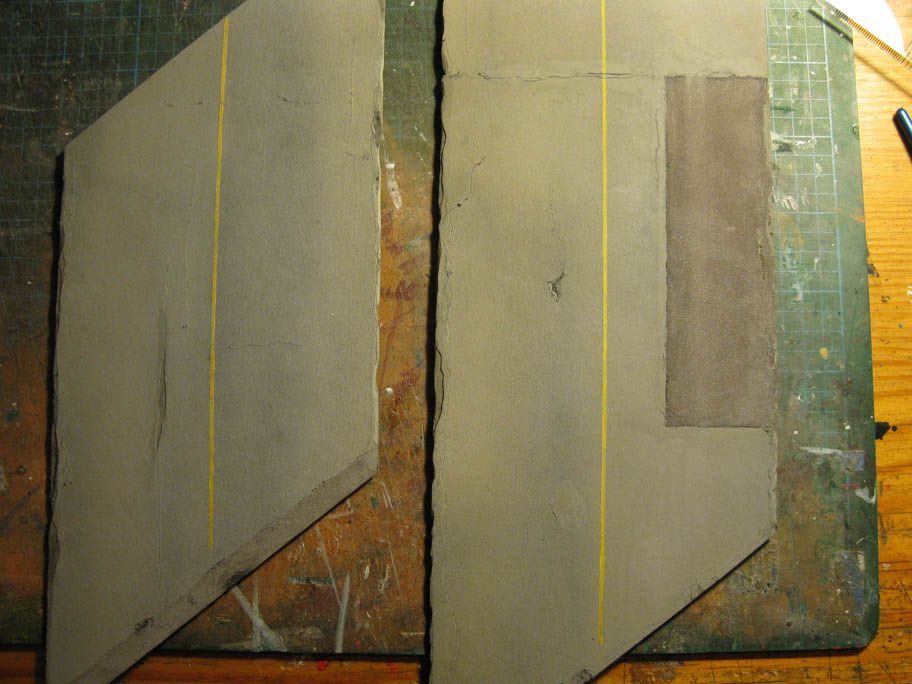
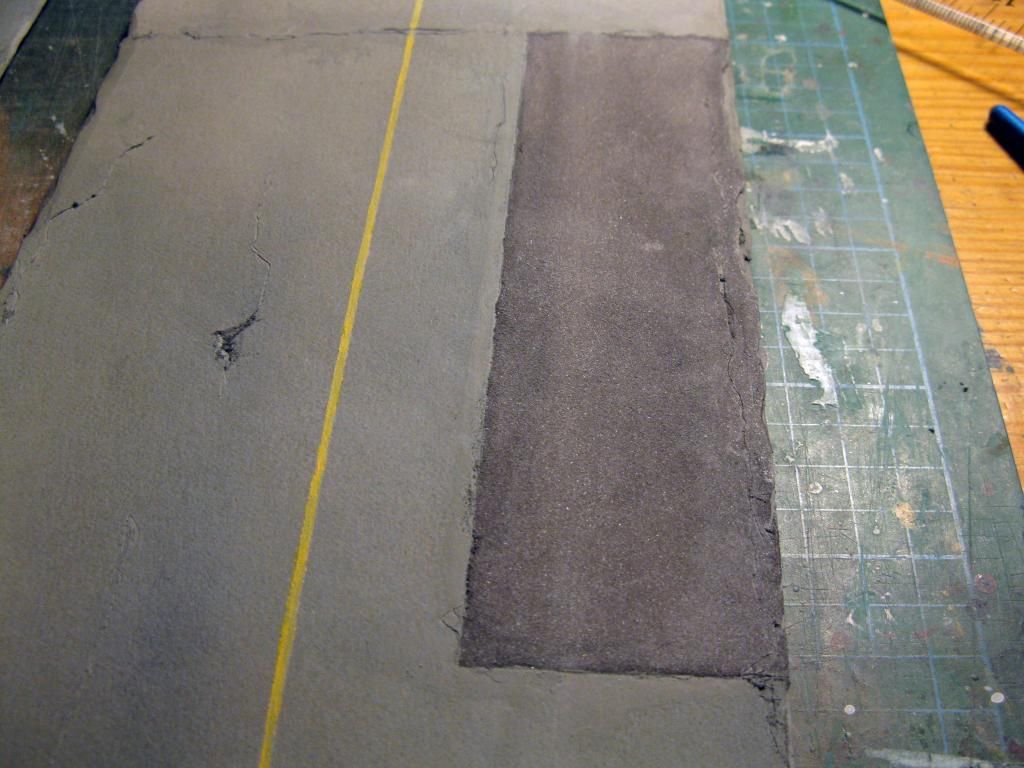
Yesterday I finally painted the yellow line on my road, following some prototype pictures from the late 70s and mid 80s. Back then, there was no stop line painted before a grade crossing on rural road.
I also added some weathering using pastel chalk. I tried no to overdo this step because more waethering will be added when the road will be surrounded by scenery and gravel parking lots near the team track.
The road was glued in place using adhesive caulk.
I also added some weathering using pastel chalk. I tried no to overdo this step because more waethering will be added when the road will be surrounded by scenery and gravel parking lots near the team track.
The road was glued in place using adhesive caulk.
Subscribe to:
Posts (Atom)